Hey everyone! Hope you've all been having a great week! I'm sure those of you with children, are into the big countdown until it's time to go trick-or-treating tonight. They are probably already bouncing off the walls with excitement, so just imagine how it will be later on tonight after a few jolts of sugar! I have loved Halloween since my own kiddos were little. I was not allowed to go trick-or-treating as a kid, so I have truly lived vicariously through our own kiddos, grandchildren, and a neighborhood full of children. It's such a fun-time to just be silly!
Well, in my last post, I said I would share some info about the pompom wreath on my pantry door. Now, you might want to get out a paper & pen, because this is pretty difficult & lengthy -- NOT! So here goes........
The Wreath
Foundation of the wreath
I used a styrofoam form, wrapped it with burlap ribbon, and then......
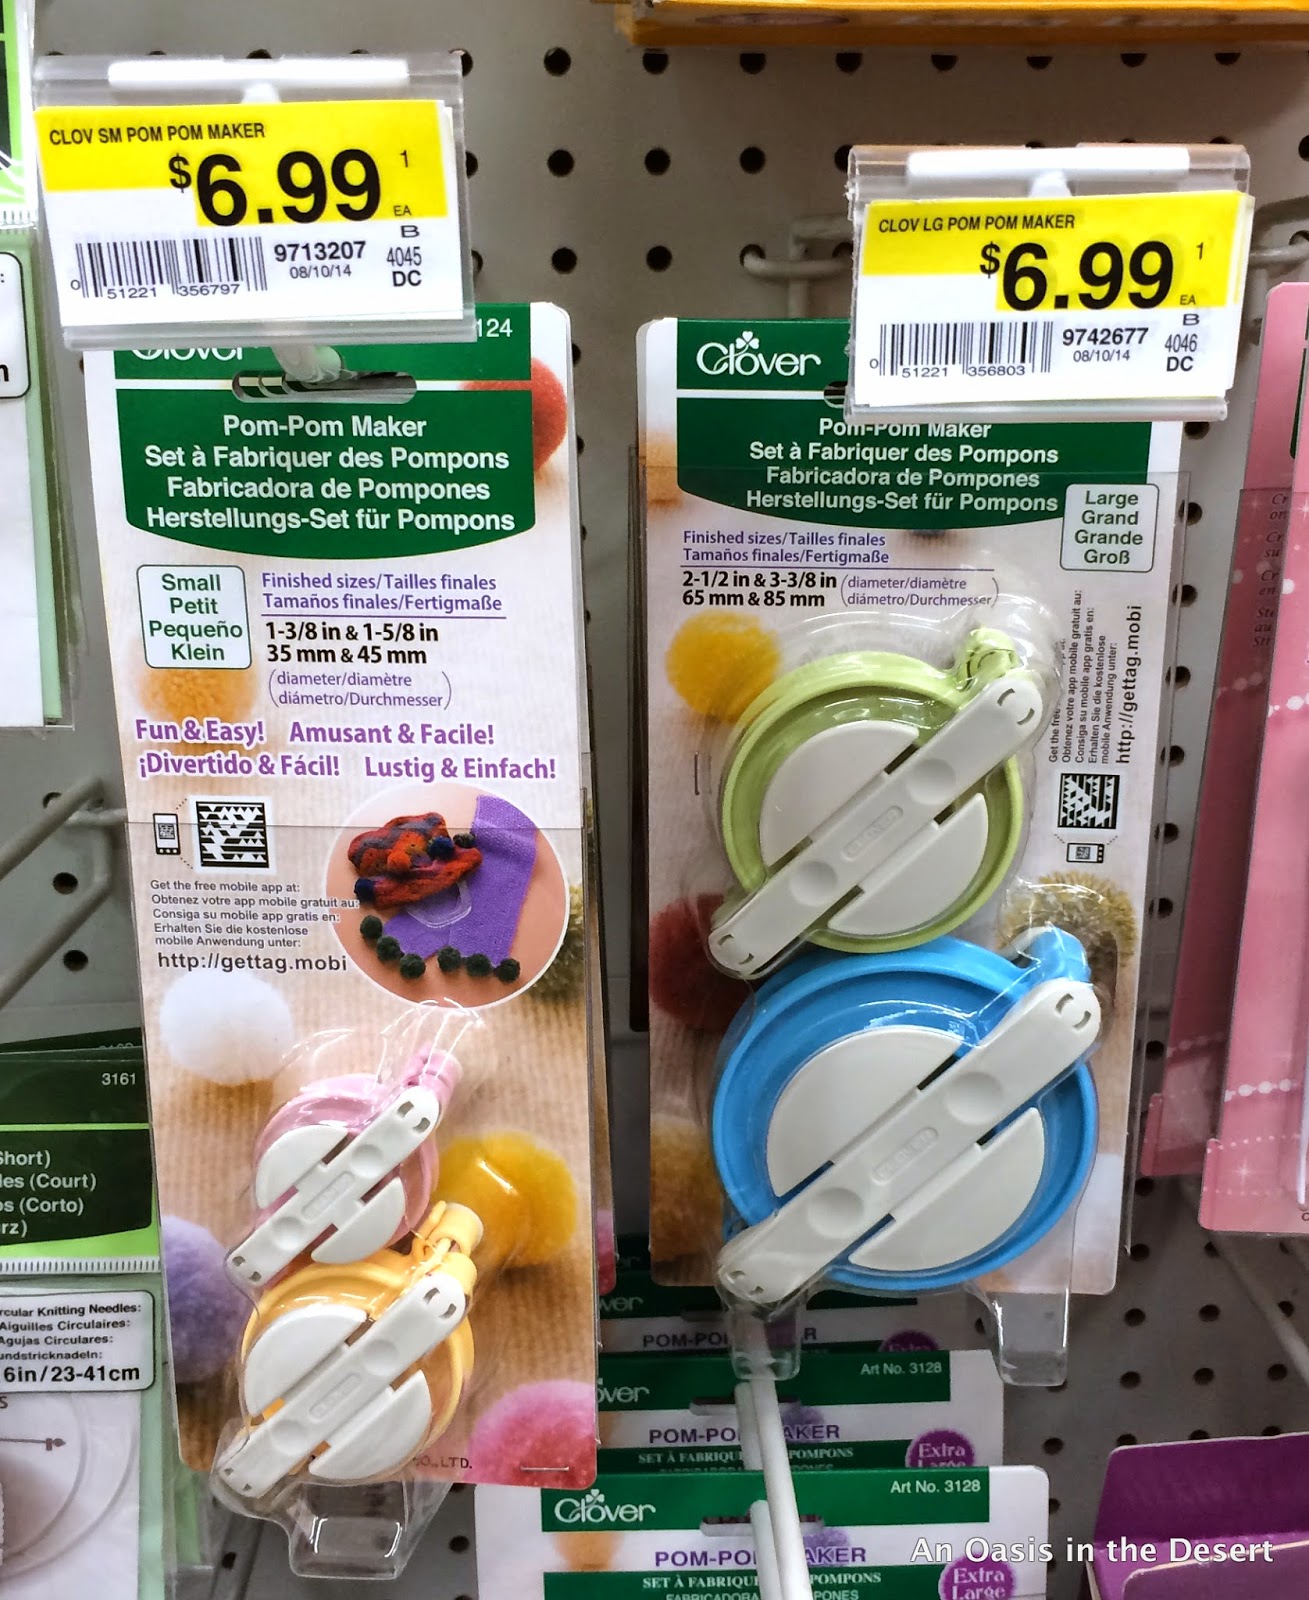
Used these pompom makers that I bought at JoAnn's -- with coupons, of course -- to make a bunch of cute little pompoms in different sizes, using leftover yarn in different colors. I know, you were all prepared for a difficult something or other, weren't you? Well, if you want it to be a bit harder, you can make pompoms by hand, but these were super-super easy!
And because I had pompoms on the brain, I went crazy making these little cutie pies......
For my Little Miss and Littliest Miss for their Christmas Tree. I got this idea from the very talented Jaime @Raising Up Rubies.
This framed print was one that I picked up at Michaels' many years ago. I had just grown tired of it, which is why I hung my "word for the year" banner over it. Anyway, while cleaning out some very old patterns (I mean like 20+ years old), I came up with this idea......
I mod-podged some pattern pieces to a sheet of poster board that I cut to fit the frame, and I also printed out some pictures of some vintagey-looking sewing room scenes, button cards (I added my own buttons for some depth), scissors, tape measure, etc. and mod podged those over the pattern pieces. The old "picture of wood" frame got some paint-love to brighten it up.
Ta-da! I think it turned out pretty nice, and is perfect for this area of my Momma Cave.
This bright little piece of sunshine is one of those myriad of ideas that just pop into my head. I was inspired by all of the fun things I've seen other bloggers do with book pages. I started out with just a cardboard triangle shape, added one layer of just book page leaves (draw your own or look on Pinterest for countless leaf patterns), then I pulled several scrapbook cardstock pages for some additional leaves & pops of color. I also glued some book pages to some of the cardstock pages, cut them out and bent them slightly down the middle to add more dimension.
To finish it off, I tied some ribbons into simple little bows, glued them randomly all over the little swag, and added a few jewels here and there. I used a wreath hanger to hang it over the door to my
Momma Cave. I think it turned out super-cute!
I've been crushing over all the cute sweater pumpkins that have been popping up everywhere, so I found a sweater at GW and got busy. I made 2 of these little cuties just from the cowl neck of the sweater. I added a cute little stem that I had saved from one of last year's real pumpkins -- I used a bit of Rub'n Buff Gold Leaf just for fun. I also used one of my leaf patterns to cut out 2 leaf shapes from turquoise felt & glued them together with a piece of wire in the middle to add some "bendability!" This little project was so easy and so much fun & turned out so cute!
Now, as much as I love Halloween, I don't have too many "Halloweenie" decorations and definitely non of the creepy crawly, spiders and eyeballs stuff -- I'll leave that to those of you with children who love all that guts and ghoulishness stuff. For the most part, mine are very tame & all are VERY old, but I thought I would share a few pics of where I have them displayed.
Next to my kitchen sink
Hearth room game table
The "witch is in" and watching over the foyer from the entry table !
Laundry room door
Door from laundry room to garage.
I made this quilted wall-hanging several years ago, and what better place to display it than in the most utilitarian room in our home -- makes me smile even while I'm doing laundry!
So there you have it! Just wanted to let you know what I've been up to, lest you think that all I do is sit around eating bonbons, watching TV & blogging......teehee! I hope you enjoyed your visit and, please come again soon. You are always welcome here!
I sometimes like to party with these lovely bloggers:
Monday
Cindy at Dwellings--The Heart of Your Home for Amaze Me Monday
Susan at Between Naps on the Porch for Metamorphosis Monday
Tuesday
Maria Elena at Our Home Away from Home for Tuesdays at Our Home
Marty at A Stroll Thru Life for Inspire Me Tuesday
Leslie at House on the Way for Twirl & Take a Bow
Mary Beth at Cupcakes and Crinoline for Project Inspired
Wednesday
Kathryn at The Dedicated House for Before and After Wednesday
Thursday
Kelly at Live Laugh Rowe for Live Laugh Linky Party
Richella at Imparting Grace for Grace at Home
Pamela at From My Front Porch to Yours for Treasure Hunt Thursday
Friday
Kathryn at The Dedicated House for Anything Blue Friday
Jody & Stan at Rooted in Thyme for Simple and Sweet Fridays


